
WordPress is, without a doubt, one of the best open source, free platforms for creating expertly crafted websites. For many customers over the past few years, the platform has emerged as their preferred application.
WordPress is renowned for being simple to install. We suggest reading our tutorial on How to Install WordPress via Softaculous if you are a complete newcomer to hosting. While Softaculous is available with all Hosterion hosting plans, any webmaster will find it helpful to be able to manually install WordPress using the official file package and an FTP client.
WordPress installation is often a simple process that takes less than five minutes to complete.
Table of Contents:
How to Download and Extract the WordPress Files
For the manual WordPress install, you will need to download the application’s primary installation package in order to complete the installation. It is distributed and downloaded via the official WordPress website.
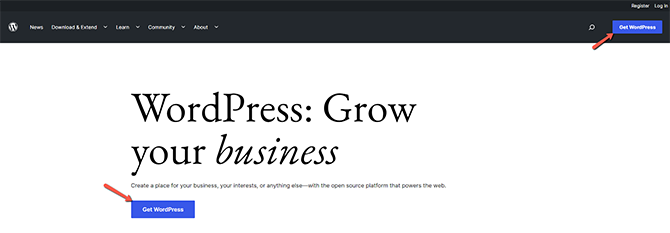
When you click the Get WordPress button, you will be taken to the platform’s download page, where you can click a different, comparable button to get the most recent installation files.
Latest Version
We always advise getting the most recent stable version of WordPress for security reasons. It will ensure that your company is shielded from the most recent vulnerabilities on the “market” and that security gaps are routinely patched.
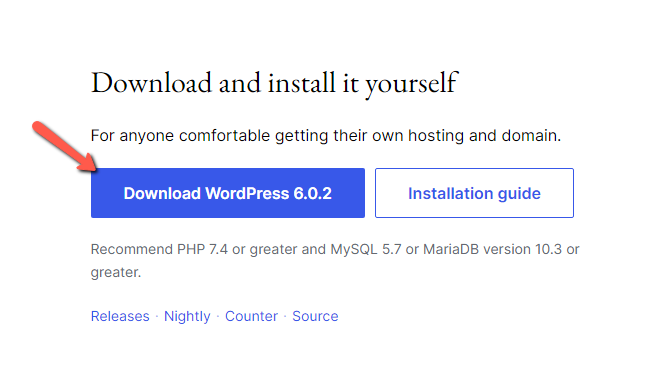
Once you have received the installation zip, you should extract it so you can examine the installation files inside.
A folder called “wordpress” will be the result of the extraction operation. You can see all the files necessary for the application to be installed properly if you access that folder.
How to Upload the WordPress Files with FTP
Your next step is to upload the downloaded WordPress files to the hosting account directory where your application belongs. Of course, you should place all of the files in the public_html directory if you want your website to be accessible via your primary domain.
Working with FTP
You can upload using easy-to-use FTP service. Please review our FTP tutorial series if you are unsure how to upload files using an FTP service.
After selecting an FTP service and establishing a connection with the server, go to the folder you have chosen for your application. Utilizing the options in your FTP client, upload the files.
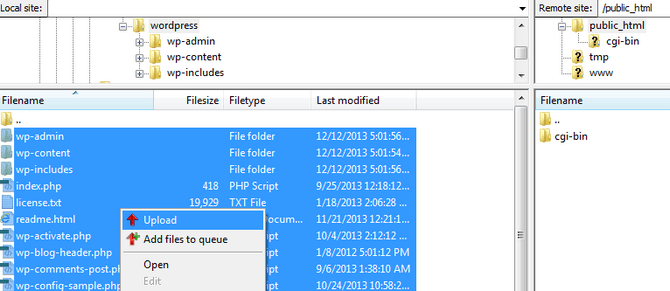
The installation process can start once all of the files have been uploaded to the chosen folder. You must go to the URL associated with the folder where the WordPress platform should be in order to accomplish that. In this situation, the public_html folder will serve as the default location. Therefore, we must go to the main domain associated with our account, example.com, in order to access the installation wizard.
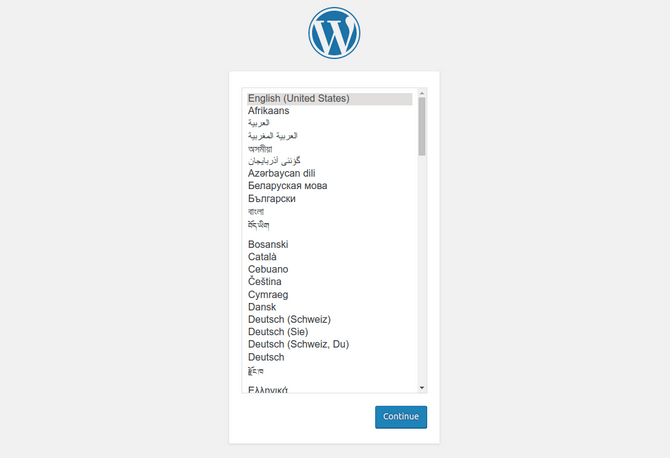
The following will be presented whenever you access it through the browser of your choice, where you must select the desired language.
How to Create a MySQL Database
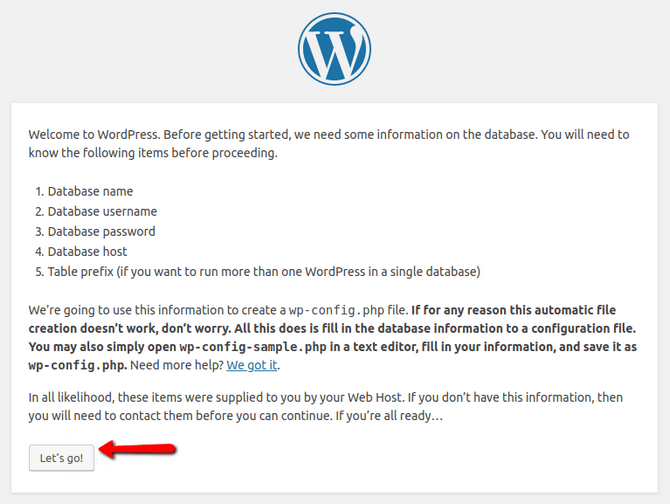
You will see a notification stating that there is no configuration file as soon as you access the installation wizard. You did nothing wrong, so everything is fine. Since this is a brand-new installation, it is expected for this warning message to be displayed even if there is no platform configuration file present.
The wizard will inform you of the requirements you must meet for the platform to function on the server in the following step. Of course, a database is required as WordPress is a PHP/MySQL-based platform.
MySQL Database Wizard
For that matter, please start by going through our tutorial on How to Create a Database via cPanel if you have any questions on how to set up a new database and assign a user to utilize it.
The next step is to click the “Let’s go!” button to start the installation procedure after creating a new database and designating a user for it.
How to Setup the WordPress Configuration File
To enable the platform to use a database, you must complete all the database data fields on the next page.
- Database name – The name of your database.
- Database username – The name of the user you have granted privileges to operate with the database.
- Password – The password you have configured for the user you have added to the database.
- Database host – The hostname of the database server. If the MySQL server is hosted on the same server as your hosting account is, please use localhost. All our customers should use localhost or 192.168.0.1 for the value of this field unless the database is situated on a separate server.
- Table prefix – The prefix for the tables in the database of the application. Databases for different WordPress instances should have different prefixes. Also, for security reasons, it is highly recommended you change this prefix from the default “wp” one.
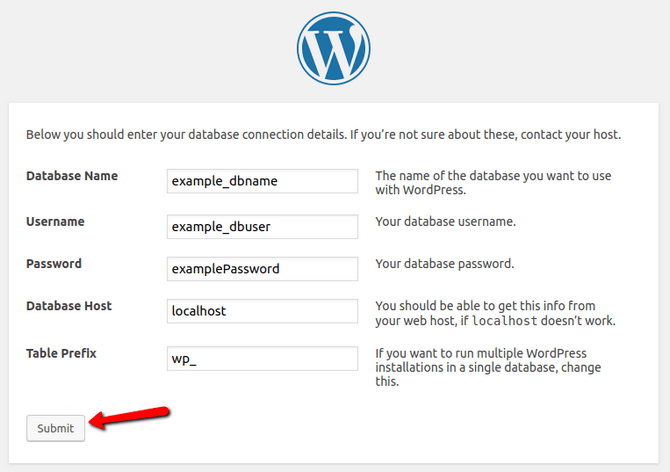
As soon as you fill in all the required information, please press the Submit button so the installation process can continue with the next step.
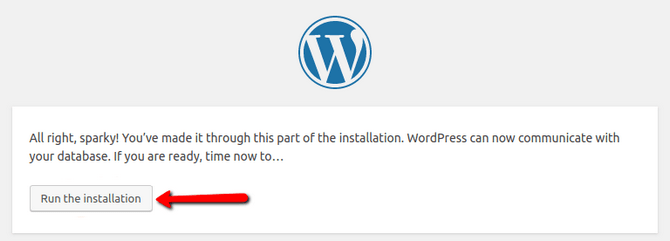
The following step is to let you know that the information you submitted regarding your database is accurate and the installation process can move on. Go ahead and press the Install button to begin.
You must complete the blanks on the next page in order to finish the installation procedure.
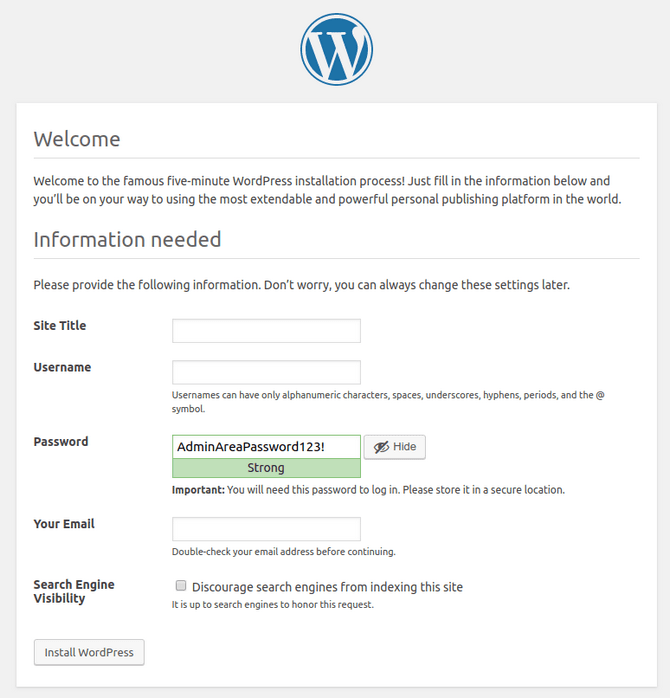
How to Create an Administrators Account
To create an Administrators Account, you need to fill the following fields with respective information:
- Site Title – The title you would like your website to have.
- Username – The account name used for logging into the admin area of your WordPress platform.
- Password – The password needed to access your WordPress-based website’s admin account. Please take note that you must enter your password twice for confirmation.
- Your Email – Your email address will be used by the platform to give you reports and, in some situations, to configure plugins.
- Privacy – Search engines that should index your website will be able to do so if you choose this option. Otherwise, the installer will add a few extra lines to your account’s robots.txt file, disabling the search engines’ ability to index your website.
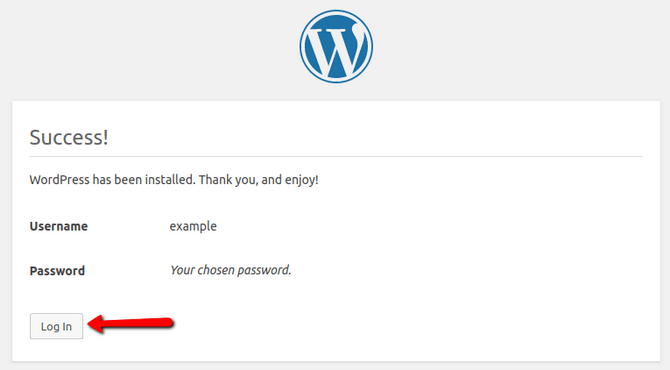
You’ll learn whether the installation went smoothly on the following screen. You should therefore click the login option to access the admin section of your website:
Congratulations! You have installed WordPress manually on your hosting account.